All Posts
Seeds on the Rise: Unleashing the Potential of Starting Seeds in Trays
Jan
Introduction to Starting Seeds
In the gardening world, an exciting journey is starting your own plants from seeds. This process, often done in trays, is a cost-effective method of growing a wide variety of plants, from vegetables to flowers. This section will explore the benefits of starting seeds in trays and the ideal conditions for germination.
Benefits of Starting Seeds in Trays
Starting seeds in trays is a popular method among gardeners for many reasons. One of the main advantages is that it allows for better control of environmental factors such as temperature and moisture, leading to higher success rates in germination and growth Source.
Specifically, the use of seed starting trays with individual cells or compartments allows for better organization and easier transplanting of seedlings Source. This is particularly useful when you are dealing with a large number of seeds or a variety of different plant species.
Starting seeds in trays also gives you a head start on the growing season, enabling you to have seedlings ready to plant as soon as the outdoor conditions are suitable. This can result in earlier harvests and blooms. For a complete guide on when to start your seeds indoors, check our article on when to start seeds indoors.
Ideal Conditions for Germination
To maximize the success of starting seeds in trays, it’s essential to create the ideal conditions for seed germination. This includes using a high-quality seed starting mix, providing consistent moisture, and maintaining the appropriate temperature Source.
A good seed starting mix should be lightweight, well-draining, and sterile to ensure optimal germination and prevent diseases from affecting the seedlings. It’s also important to water the seeds consistently, keeping the soil moist but not waterlogged.
Temperature is another crucial factor for seed germination. Most seeds prefer a warm environment, so placing your seed trays in a warm location can improve germination rates. However, the exact temperature needed can vary depending on the type of seeds you are planting, so it’s a good idea to check the seed packet for specific instructions.
Once the seeds have sprouted, they will need sufficient light to grow properly. This can be achieved with natural sunlight or supplemental artificial lighting. Fluorescent lights or LED grow lights positioned a few inches above the seedlings can provide the necessary lighting conditions Source.
Starting seeds in trays can be a rewarding process, offering a chance to witness the miracle of plant growth from the very beginning. By understanding the benefits and ideal conditions for germination, you can maximize the success of your seed starting endeavors.
Choosing the Right Seed Tray
One of the first steps in successfully starting seeds in trays is selecting the appropriate tray for your seeds. This choice can greatly influence the success of your seed starting endeavor, as different tray types and features can affect the germination rate and overall health of your seedlings.
Types of Seed Trays
There are various types of trays available for starting seeds, each with their own unique features and benefits. Some popular options include:
- Plastic Trays with Individual Cells: These trays are reusable and come with individual compartments or “cells” for each seed. This design allows each seed to grow independently and reduces the risk of root entanglement. It also makes transplanting easier as each cell can be pushed out from the bottom.
- Biodegradable Peat Pots: Peat pots are biodegradable and can be planted directly into the ground, reducing transplant shock. They are ideal for larger seeds or ones that do not transplant well.
- Recycled Materials: Everyday items such as egg cartons or yogurt cups can be used as makeshift seed trays. These are cost-effective options but may require extra preparation, like adding drainage holes.
- Seed Trays with Humidity Domes: These trays come with a clear plastic lid or dome that helps maintain humidity, creating a mini greenhouse effect. This can be particularly beneficial for seeds that require high humidity levels to germinate.
For a comprehensive list of options, visit our guide on seed starting supplies (Two Sisters Flower Farm).
Optimal Tray Size and Features
When choosing a seed tray, size matters. The size of the tray and individual cells or compartments can affect how long your seedlings can comfortably grow before needing to be transplanted.
| Tray Size | Cell Width | Seedling Growth Duration |
|---|---|---|
| Small Tray | 1.5″ | 2-3 weeks |
| Large Tray | 2.5″ | 3-4 weeks |
These durations can vary based on the specific growth rates of different plant species (Source).
In addition to size, other important features to consider when choosing a seed tray include:
- Drainage Holes: These are essential for preventing waterlogging and ensuring proper drainage for the seeds (Two Sisters Flower Farm).
- Material: The material of the tray can affect the tray’s durability, usability, and impact on the environment. It’s essential to choose a material that suits your gardening style and values.
- Ease of Transplanting: Consider how easy it will be to remove the seedlings from the tray when it’s time to transplant them. Trays with flexible plastic cells can make this task easier.
In general, it’s important to choose a seed tray size and type that matches the size and needs of the seeds being planted. This can help ensure a successful and enjoyable seed starting experience. For more information on starting seeds, check out our guide on how to start vegetable seeds.
Preparing Your Seed Tray
Before you start planting your seeds, it’s essential to prepare your seed tray properly. This involves selecting the right seed starting mix and understanding the right filling and watering techniques.
Selecting a Seed Starting Mix
The first step in preparing your seed tray involves selecting a high-quality seed starting mix. It’s important to use a mix that is lightweight, well-draining, and sterile to ensure optimal germination and prevent diseases from affecting the seedlings (Bootstrap Farmer).
A soilless seed starting mix or a mixture of peat moss, vermiculite, and perlite is often recommended as it provides good drainage and prevents damping off disease (Garden Betty). These mixes are designed to retain moisture while allowing excess water to drain away, providing the ideal growing conditions for young seedlings.
For more information on selecting the right seed starting mix, visit our guide on seed starting mix.
Proper Filling and Watering Techniques
When filling your tray, ensure that it is filled with the seed starting mix to just below the rim. Lightly tamp down the mix to remove any air pockets and create a firm base for the seeds, but be careful not to compact it too much as this can hinder root growth.
Once your tray is filled, it’s time to water the mix. It’s important to pre-moisturize the mix before planting your seeds to ensure it is evenly damp. Add water slowly and stir the mix until it feels like a well-wrung sponge. Be careful not to overwater as this can lead to waterlogged conditions that are detrimental to seed germination.
Remember, seed trays with drainage holes are essential. They prevent waterlogging and ensure proper drainage for the seeds.
Proper preparation of your seed tray can significantly impact the success of your seed starting venture. By choosing the right starting mix and employing proper filling and watering techniques, you can create the ideal environment for your seeds to sprout and thrive. For more tips on starting seeds, check out our guide on how to start seeds indoors.
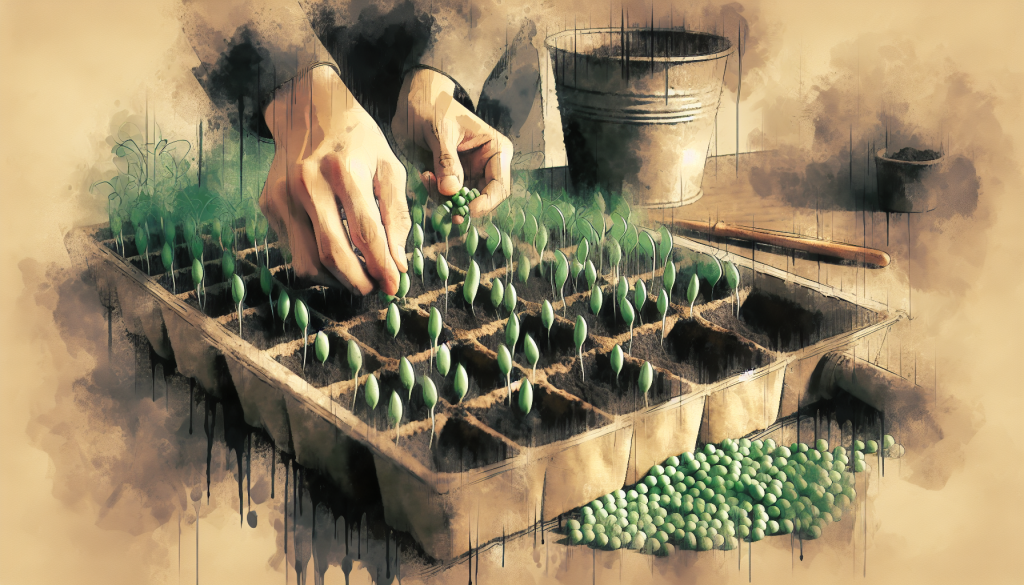
Planting the Seeds
After choosing your seeds and preparing your seed tray, the next step in starting seeds in trays is to plant the seeds. This process requires a firm understanding of seed depth and spacing, as well as any special treatments that might be necessary for certain seeds.
Understanding Seed Depth and Spacing
When planting seeds in a tray, it is important to follow the specific instructions on the seed packet regarding seed depth and spacing. Generally, seeds should be planted twice as deep as their size and spaced evenly in the tray (WikiHow).
This careful placement of seeds helps ensure that each seedling has enough room to grow and develop without crowding out its neighbors. It also allows for more efficient watering, as the water can easily reach the roots of each seedling without being obstructed by other plants.
For more information about when to start seeds indoors and how long it typically takes for seeds to germinate, check out our articles on when to start seeds indoors and how long does it take for seeds to germinate.
Special Treatments for Certain Seeds
Some seeds may require special treatment, such as soaking or scarification, to improve germination rates. Soaking involves submerging the seeds in water for a certain period of time, while scarification involves lightly scratching or nicking the seed coat to help it absorb water more easily. These treatments can help to speed up germination and increase the overall success rate of your seedlings (Thrive and Grow Gardens).
Other seeds may require stratification, which involves exposing the seeds to cold temperatures for a period of time to mimic the natural conditions that the seeds would experience in the wild.
Before starting seeds in trays, it’s important to research the specific requirements of each type of seed. This can help ensure that you provide the best conditions for your seeds to germinate and grow, whether you’re starting seeds in egg cartons, peat pellets, or any other type of seed tray. For more tips on starting seeds, check out our guide on how to start seeds indoors.
Caring for Your Seedlings
Once the seeds have been sown, the journey of starting seeds in trays enters an important phase—caring for the emerging seedlings. This involves maintaining optimal moisture and temperature conditions, while also ensuring that the seedlings receive adequate light for their growth and development.
Maintaining Moisture and Temperature
Providing consistent moisture and maintaining the appropriate temperature for seed germination are crucial factors for successful seed starting. The soil in the tray should be consistently moist but not waterlogged. This can be achieved by watering the tray from the bottom or misting the soil surface with a spray bottle.
The seed tray should be placed in a warm location, as many seeds require a certain temperature range to germinate effectively. Using a seedling heat mat can help maintain consistent soil temperature, especially in cooler environments.
| Action | Temperature |
|---|---|
| Place seed tray in a warm location | 68-86°F (20-30°C) |
| Use a heat mat (for cooler environments) | 68-86°F (20-30°C) |
The Importance of Light for Growth
Once the seeds have sprouted, it’s crucial to provide them with adequate light to prevent them from becoming leggy and weak. This can be achieved with fluorescent lights or LED grow lights positioned a few inches above the seedlings (Garden Betty).
Seedlings generally need 12-16 hours of light per day. If you’re using artificial light, make sure to adjust the height of the lights as your seedlings grow, keeping them 3-4 inches above the plants at all times.
| Seedling Stage | Light Requirement |
|---|---|
| Sprouting | 12-16 hours/day |
| Post-Sprouting | 12-16 hours/day, adjustable height |
Maintaining the right balance of moisture, temperature, and light is key to nurturing healthy seedlings. Remember, the effort put into starting seeds in trays is rewarded when these seedlings grow into flourishing plants. For more tips and advice on seed starting, explore our other articles on when to start seeds indoors and the supplies you’ll need for seed starting.
Transplanting Seedlings
The process of moving seedlings from their initial trays to a larger, more permanent location is called transplanting. This is a critical step in the journey of starting seeds in trays.
When and How to Transplant
Typically, seedlings are ready to be transplanted when they have developed their first set of true leaves. At this point, they have outgrown their initial trays and need more room to grow. The process of transplanting needs to be done with care to avoid damaging the young plants.
To transplant seedlings, the soil in the seed tray and the soil in the garden bed should be wet. This helps the soil stick together, making it easier to remove the seedling from the tray and to create a hole in the garden bed for the plant (Source).
Gently push up from the bottom of the seed tray to pop the seedling out, taking care to keep the roots intact and the seedling undamaged. Place the seedlings into the holes in the garden bed, backfill the soil around them, and water consistently to establish the roots.
Hardening Off and Aftercare
Before transplanting seedlings, it is important to harden them off. This process involves gradually exposing the plants to outdoor conditions over several days. This helps the seedlings acclimate to changes in temperature, light, and wind, reducing the risk of transplant shock.
After the seedlings have been transplanted, they will need regular watering to help them establish in their new location. Keep the soil uniformly moist but avoid overwatering, as this can lead to root rot.
In addition to watering, the seedlings may benefit from a light application of a balanced fertilizer to provide them with the nutrients they need to grow strong and healthy. However, it’s important to wait until the seedlings have had a chance to settle into their new location before applying any fertilizers.
Transplanting seedlings is a crucial step in the process of starting seeds in trays. By following these guidelines, you can help ensure that your seedlings have the best possible start in their new home. For more information on starting seeds, including tips on choosing the right seed starting mix and how to care for your seedlings, explore our other articles on starting seeds.