All Posts
Egg-cellent Seed Starting: How to Begin Seeds in Egg Cartons
Jan
Understanding Seed Starting
Before embarking on the adventure of starting seeds in egg cartons, it’s important to understand the basics of seed germination and how to choose the right seeds for your project.
Basics of Seed Germination
Seed germination is the process by which a plant emerges from a seed. This process begins when the seed absorbs water, swelling and breaking through its hard outer shell. The germination process continues as the seedling grows, producing roots, stems, and leaves.
Egg cartons can provide a controlled environment for seeds to germinate. The individual egg cups act as small individual pots that can hold soil and provide adequate drainage (Source). However, it’s important to note that egg cartons can become easily waterlogged due to lack of sufficient drainage (Fruition Seeds).
To learn more about the germination process and how long it might take for your chosen seeds to sprout, check out our article on how long does it take for seeds to germinate.
Choosing the Right Seeds
When starting seeds in egg cartons, it’s crucial to choose the right seeds for your project. This will largely depend on the type of plants you wish to grow and the time of year you’re beginning your seed starting project.
Some seeds are better suited to starting indoors, while others prefer to be sown directly into the garden. It’s also important to consider the size of the mature plant when choosing seeds to start in egg cartons. Seeds of plants that grow very large may not fare as well in the confined space of an egg carton, leading to stunted growth and potential transplant shock.
For more information on choosing seeds and the best time to start them indoors, refer to our article on when to start seeds indoors and how to start vegetable seeds.
Understanding the basics of seed germination and choosing the right seeds are the first steps in successful seed starting. With this knowledge in hand, you’ll be well-equipped to start seeds in egg cartons or any other seed starting containers, such as seed starting trays, peat pellets, or pots.
Why Use Egg Cartons?
The practice of starting seeds in egg cartons is gaining popularity among plant lovers and gardeners. This technique offers a range of advantages, from being eco-friendly to financially beneficial.
Eco-friendly Benefits
One of the primary reasons to start seeds in egg cartons is the eco-friendly nature of this method. Egg cartons are biodegradable and can be planted directly into the ground. This process eliminates the need for transplanting and reduces the risk of damaging delicate seedlings during the process (Instructables).
Additionally, the cardboard material of egg cartons is porous, allowing for proper drainage and aeration of the soil. This feature is particularly beneficial as it helps prevent over-watering and the development of root rot.
By using egg cartons, gardeners can contribute to the recycling of materials, reducing waste, and promoting sustainable gardening practices.
Financial Advantages
Starting seeds in egg cartons is not only an environmentally friendly practice but also a cost-effective one. It provides a controlled environment for seed germination by retaining moisture and heat. This environment increases the chances of successful seedling development and reduces the risk of seed failure (Instructables).
Moreover, each egg cup in the carton can be used to plant an individual seed, making it easy to keep track of different plant varieties. This organization eliminates the need for purchasing separate seed starting pots or trays, thus saving on gardening expenses.
In conclusion, egg cartons offer a practical, affordable, and eco-friendly solution for starting seeds. Whether you’re a vegetable gardener or a flower enthusiast, this method could be an egg-cellent addition to your gardening routine.
Preparing the Egg Cartons
Before embarking on your journey of starting seeds in egg cartons, it’s essential to adequately prepare the cartons. This involves sanitizing the cartons and setting up a mini greenhouse environment for your seeds.
Sanitizing the Cartons
Sanitizing egg cartons is a crucial step in the seed starting process. This step is necessary to prevent the spread of diseases or pests that could hinder your seedlings’ growth.
To sanitize the cartons, wash the sections with warm, soapy water and allow them to dry thoroughly. This step removes any dirt or bacteria that may have been present, ensuring a clean environment for your seeds to germinate.
Setting Up Your Mini Greenhouse
Egg cartons can also be used to create a mini greenhouse for your seeds. This practice helps to retain moisture and heat, thereby providing a controlled environment for seed germination. In turn, this increases the chances of successful seedling development and reduces the risk of seed failure.
To set up your mini greenhouse, keep the egg cartons in their entirety. Each egg cup can be used to plant an individual seed, making it easy to keep track of different plant varieties. This method not only provides an organized way to sow seeds but also allows for easy recycling of materials and reduces waste.
In conclusion, preparing egg cartons involves sanitizing them and setting up your mini greenhouse. Once done, you can proceed with planting your seeds. For more information on the process of seed starting, from selecting the right seeds to caring for your seedlings, check out our comprehensive guide on how to start seeds indoors.
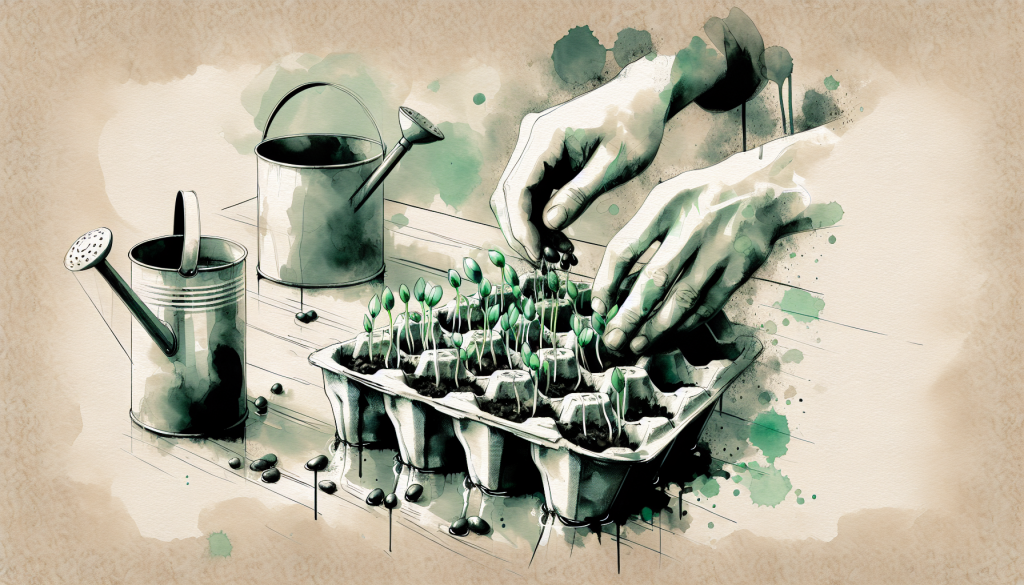
Planting Seeds in Egg Cartons
Having prepared your egg cartons, it’s time to embark on the exciting journey of sowing seeds. Filling the cartons with soil and planting the seeds are two major steps in this process.
Filling the Cartons with Soil
Egg cartons, with their individual compartments, provide an organized and compact option for seed starting. The porous cardboard material allows for proper drainage and prevents waterlogged soil, which can lead to root rot.
To fill the cartons, use a high-quality seed starting mix. Gently fill each egg cup with the soil, ensuring it’s firm but not overly packed. The soil should fill the cup up to about 1/4 inch from the top. This leaves room for the seed and the necessary covering of soil.
Sowing the Seeds
Once the cartons are filled with soil, it’s time to sow the seeds. Each egg cup can be used to plant an individual seed, making it easy to keep track of different plant varieties.
Place one or two seeds in each egg cup, depending on the germination rate of the seeds and their size. If you’re uncertain about how many seeds to plant, refer back to the seed packet instructions or check our guide on how to start vegetable seeds.
After placing the seeds, cover them with a thin layer of soil. The soil should cover the seeds, but not be so thick as to prevent the seedling from pushing through once it starts to grow.
Remember to label the cartons if you’re planting different types of seeds. This will help you keep track of the various plant varieties.
Properly sowed and cared for, seeds in egg cartons can provide a cost-effective, eco-friendly, and successful method for starting your seeds. After sowing, the next step is to care for the seedlings, ensuring they have the ideal growing conditions for healthy development. You can learn more about this in our guide on how to start seeds indoors.
Caring for Your Seedlings
Once the seeds have been planted in the egg cartons, it’s essential to provide them with suitable growing conditions. This will maximize their chances of germination and healthy growth.
Ideal Growing Conditions
Egg cartons should be placed in a warm and well-lit area, such as a windowsill or greenhouse. This provides the optimal conditions for seed germination and growth. Moreover, the egg cartons retain moisture and heat, thereby creating a controlled environment that increases the chances of successful seedling development and reduces the risk of seed failure.
It’s also vital to ensure good ventilation to prevent fungal diseases. If you’re starting seeds indoors, consider using a fan on a low setting to circulate air. For more detailed information on ideal growing conditions, visit our guide on how to start seeds indoors.
Watering and Monitoring Seedlings
Proper watering is crucial for the growth of your seedlings. The soil should be kept consistently moist but not waterlogged. Overwatering can lead to waterlogged soil and root rot, while underwatering can dry out the seeds and inhibit germination. A good rule of thumb is to water when the top inch of soil feels dry to the touch.
Regular monitoring of the seedlings is also necessary for successful growth. Keep an eye out for any signs of disease or pests and take appropriate action as necessary. You can also monitor the growth of your seedlings and compare it with the typical germination time for the type of seeds you are planting. For more information on seed germination times, check our article on how long does it take for seeds to germinate.
In summary, caring for your seedlings involves providing them with the right growing conditions, ensuring they have enough water, and regularly monitoring their health and growth. With proper care, your seedlings will grow strong and healthy, ready for transplanting when the time comes.
Transplanting Seedlings
Once your seeds have sprouted and grown into thriving seedlings in their egg carton nursery, the next step is transplanting them into a larger pot or directly into your garden.
When to Transplant
Determining the right time to transplant your seedlings is crucial for their survival and growth. Ideally, seedlings should be transplanted when they have developed their second set of true leaves. This indicates that they are strong enough to withstand the transplanting process.
It’s also important to ensure that the outdoor conditions are appropriate for transplanting if you are planning to move your seedlings directly into the garden. Most plants prefer to be transplanted on overcast days or in the early morning or late evening to avoid the stress of direct sunlight.
How to Transplant
Transplanting seedlings started in egg cartons is a straightforward process. The cardboard egg carton can be cut into individual sections and planted directly into the ground or a larger pot. This minimizes transplant shock and disturbance to the delicate roots (Instructables).
To transplant, first prepare the new planting area by digging a hole that’s large enough to accommodate the egg carton section. Then, place the entire section with the seedling into the hole, ensuring that the top of the soil in the egg carton is level with the surface of the new soil. Backfill the hole and gently press the soil around the transplant to secure it in place.
Finally, water the transplants thoroughly to settle the soil around the roots and reduce shock. Continue to monitor the transplants closely over the next few weeks to ensure they are adjusting well to their new environment.
However, it’s worth noting that seedlings started in egg cartons may have stunted growth and be more prone to transplant shock, as their roots may become tangled in the confined space of the carton (Fruition Seeds). For alternatives to starting seeds in egg cartons, consider using other effective containers such as peat pots, plastic trays with cells, or even DIY containers made from paper or cardboard (Fruition Seeds).
By following these guidelines on transplanting seedlings, you can nurture your seedlings from their egg carton nursery to thriving plants in your garden or larger pots.
Potential Drawbacks
While the concept of starting seeds in egg cartons may seem eco-friendly and cost-effective, there are some potential drawbacks to consider.
Drainage Issues
One of the major concerns with using egg cartons for seed starting is the lack of sufficient drainage. Egg cartons can easily become waterlogged, potentially leading to issues like root rot and fungal diseases such as damping off (Fruition Seeds). Poking holes in the bottom of each compartment can help improve drainage, but this may not entirely resolve the problem.
In contrast, other seed starting containers, such as peat pots, plastic trays with cells, or DIY containers made from paper or cardboard, are designed with adequate drainage in mind, making them a more reliable choice for successful seed germination.
Constrained Growth Space
Another drawback to using egg cartons for seed starting is the limited space for root development. The small compartments can restrict root growth, leading to tangled roots and potentially stunted seedling growth. Seedlings started in egg cartons may also be more prone to transplant shock due to these root disturbances (Fruition Seeds).
For seedlings that require a larger growing space or a longer period before transplanting, you may want to consider starting them in larger containers or seed starting trays.
Despite these drawbacks, egg cartons can still be a viable option for starting seeds, especially for gardeners on a budget or those looking for eco-friendly solutions. However, it’s important to be aware of these potential issues and take steps to mitigate them, such as ensuring proper drainage and transplanting seedlings to a larger container at the appropriate time. For more information on when and how to transplant seedlings, check out our articles on when to start seeds indoors and how to start vegetable seeds.