All Posts
Plant Parenthood 101: How to Start Vegetable Seeds Successfully
Jan
Understanding Seed Germination
Navigating the world of gardening, particularly when it comes to understanding how to start vegetable seeds, can be a complex process. One of the key concepts to grasp is seed germination, the process that takes a dormant seed and awakens it to grow into a new plant.
The Science of Seed Germination
Seed germination is, simply put, the process by which a seed begins to sprout and grow into a plant. This process is triggered when the seed absorbs water, swells, and breaks through its coat. The absorbed water activates enzymes that begin to digest the stored food in the seed until it can photosynthesize and feed itself.
The first root, or radicle, exits the seed and anchors it into the soil. Next, the shoot emerges and grows towards the light. This shoot will bring forth leaves that will begin the process of photosynthesis, converting light into the energy required for growth.
Understanding the science of seed germination is fundamental when it comes to figuring out how to start vegetable seeds indoors or outdoors. It aids in identifying the optimal conditions for growth and the factors that could potentially hinder it.
Factors Influencing Germination
Several factors influence the process of seed germination, with temperature, light, and moisture being the most critical.
- Temperature: Seeds require specific temperature ranges to germinate. If the temperature is too low or high, it can inhibit germination or slow down the process.
- Light: Some seeds require light to germinate, while others need darkness. It’s essential to know the light requirements of the specific seeds you’re starting.
- Moisture: Water is crucial for the activation of the seed. However, too much water can cause the seeds to rot, while too little can prevent germination.
Understanding these factors is crucial for successfully starting vegetable seeds. It can help gardeners create the best environment for their seeds and increase their chances of successful germination. For more information on the ideal conditions for seed germination, refer to our article on how long does it take for seeds to germinate.
Starting vegetable seeds, whether it’s indoors or outdoors, is an essential aspect of edible gardening (Gardeners.com). It allows for better control of growing conditions, provides an earlier start to the growing season, and yields healthy and robust plants ready for transplanting when the weather warms up. Understanding the science behind seed germination and the factors that influence it can significantly increase your success in growing your own vegetables from seeds.
Preparing for Seed Starting
Before embarking on the journey of starting vegetable seeds, a proper understanding of the seeds and the information on their packages is necessary. This knowledge will guide in choosing the right seeds and understanding how to care for them.
Choosing the Right Seeds
The first step towards successfully starting vegetable seeds is choosing the right seeds. The choice of seeds to plant will depend on factors such as the climate, the gardener’s preference, and the growth conditions the gardener can provide. When choosing seeds, consider factors such as disease resistance, maturity time, plant size, and flavor.
Starting vegetable seeds is a key part of edible gardening, allowing better control of growing conditions and aiding the establishment of seedlings before being transplanted outdoors.
Choosing the right seeds is a crucial part of the gardening basics. To learn more about the process of choosing the right seeds, visit our article on how to start seeds indoors.
Understanding Seed Packages
Seed packages are a treasure trove of information. They provide vital details about the seeds, including the variety, planting instructions, days to germination, days to maturity, and more. By understanding the information on the seed package, gardeners can ensure they provide the optimal conditions for the seeds to germinate and grow.
The package will also provide information on when to start seeds indoors, helping you to plan the timing of your seed starting process.
Finally, the package will provide information on the plant’s growth habits and size, which can guide you in choosing the right seed starting pots. For more information on how long does it take for seeds to germinate, check our guide.
In conclusion, understanding your seeds and their specific requirements will set you on the path to successful seed starting. This, combined with the right tools and techniques, will help you grow a healthy and productive garden.
Ideal Conditions for Starting Seeds
Creating the right conditions for your seeds is crucial in ensuring successful germination and healthy seedlings. Understanding the importance of temperature and the role of light in germination is key when learning how to start vegetable seeds.
Importance of Temperature
Soil temperature is a crucial factor in seed germination, as different vegetables have different temperature requirements for optimal germination. For instance, many vegetable seeds, such as tomatoes and peppers, require a soil temperature of 70 to 75°F for successful germination.
The optimal temperature for starting vegetable seeds is typically between 70-80°F (21-27°C) during the day and 60-70°F (15-21°C) at night. Starting vegetable seeds indoors allows for greater control over temperature, moisture, and light, resulting in healthier seedlings.
| Vegetable | Optimal Soil Temperature for Germination (°F) |
|---|---|
| Tomatoes | 70-75 |
| Peppers | 70-75 |
| Lettuce | 60-65 |
| Spinach | 65-70 |
| Cucumbers | 70-75 |
Role of Light in Germination
Light plays an essential role in the germination of vegetable seeds. Seedlings should be provided with 14-16 hours of light per day to promote healthy growth. If natural light is not sufficient, supplemental lighting can be used.
It’s important to note that not all seeds require light to germinate. However, once they sprout, all seedlings need ample light to grow and develop properly. Light not only assists in photosynthesis but also helps prevent seedlings from becoming leggy (tall and spindly) due to stretching for light.
Maintaining the right balance of temperature and light is critical in ensuring successful germination and healthy seedling growth. As you embark on your seed starting journey, take the time to understand the specific requirements of the vegetable seeds you wish to grow. This understanding will enhance your chances of success and bring you one step closer to harvesting your homegrown vegetables. For more tips and guidance on starting seeds, check out our detailed guide on how to start seeds indoors.
Key Steps to Start Vegetable Seeds
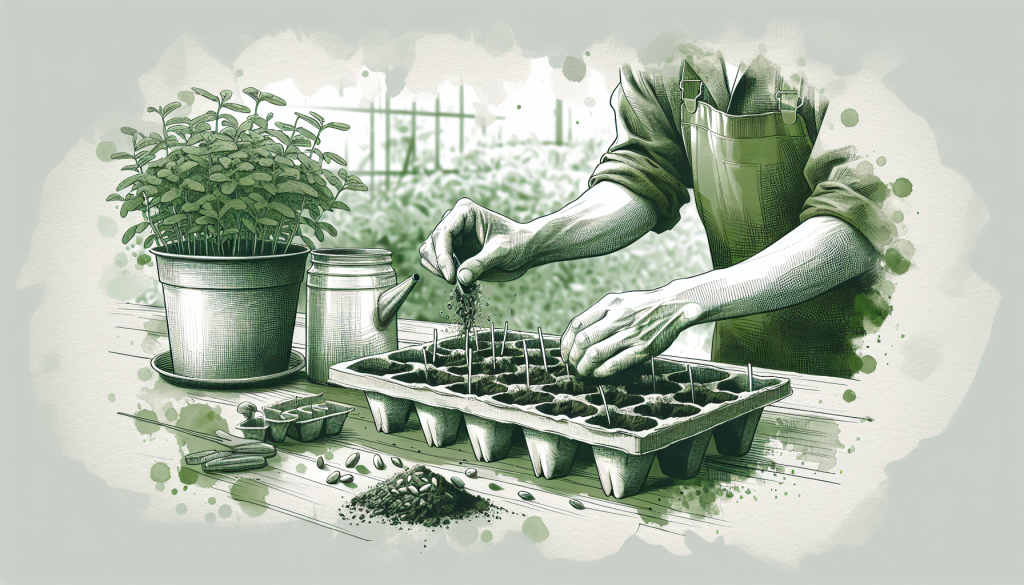
The process of starting vegetable seeds involves several important steps. One of the first and most crucial steps is choosing the right containers for seed starting, followed by understanding the correct seed sowing techniques.
Choosing the Right Containers
The choice of seed starting containers depends on factors such as plant quantity, plant size, upfront cost, and renewability. These factors will determine the best container for each gardener’s needs.
Seedling pots are a simple and reliable method for starting seedlings. They allow for custom selection of pot size and shape and can be easily washed and reused. Salvaged pots, such as small pots that come with store-bought seedlings or small herb pots, can be reused for seed starting. They come in various sizes and can be a cost-effective and eco-friendly option.
Recycling containers like drinking cups or food containers can also be used as seedling pots. They are a free and accessible option for beginner gardeners. Drain holes can be added to these containers to ensure proper drainage.
Jiffy pellets are another option for seed starting. These are compressed disks of peat moss or coir that expand when soaked in water. They come with their own potting mix and nutrients and are a simple solution for first-time gardeners. However, they need to be cut away when planted to prevent issues with the netting.
For more information on choosing the right containers, visit our page on seed starting pots.
Seed Sowing Techniques
After choosing the right containers, the next step is sowing the seeds. It’s important to use a seed-starting mix that is designed for seed germination, as it provides the right balance of moisture retention and drainage (Fine Gardening).
Sow the seeds at the proper depth, which is typically two to three times the diameter of the seed. This will ensure the seeds are not planted too deep, a common mistake that can hinder germination.
Ensure that seedlings receive adequate light to prevent them from becoming spindly and weak. Seedlings need a good amount of light to grow strong and healthy.
Once the seedlings have grown their first set of true leaves, they can be transplanted to a larger pot or directly outdoors, depending on the weather and the specific plant requirements.
Starting vegetable seeds indoors can give gardeners a head start, allowing them to have healthy and robust plants ready for transplanting when the weather warms up. For more tips on how to start seeds indoors, check out our guide on how to start seeds indoors.
The Role of Water in Seed Starting
Water is a vital component in the process of starting seeds. It aids in the germination process and helps young seedlings grow. Understanding the right watering techniques and the importance of drainage can contribute significantly to the success of your seed-starting venture.
Proper Watering Techniques
When it comes to watering seeds, consistency is key. It’s crucial to maintain consistent soil moisture while starting vegetable seeds, as drying out or overwatering can hinder germination. The top inch of soil should feel moist to the touch, but not soaked or waterlogged.
A practical way to ensure consistent moisture is by covering the seed tray with a plastic dome or plastic wrap. This creates a greenhouse effect, preserving moisture levels during the critical germination stage.
One recommended technique is watering seeds from the bottom. This can be done by placing the seed tray in a tray or saucer filled with water, allowing the soil to soak up the moisture. This method helps prevent disturbing the delicate seedlings.
For a gentle touch, consider watering with a fine mist spray bottle. This approach allows you to provide moisture without disturbing the seeds or seedlings.
The frequency of watering will depend on factors such as the type of soil, temperature, and humidity. It is advised to check the moisture level of the soil daily and adjust watering accordingly.
Importance of Drainage
While watering is crucial for seed germination, good drainage is equally vital. Proper drainage ensures that the soil is moist but not waterlogged, which could potentially lead to problems such as seed rot or fungal growth.
After germination, reducing the frequency of watering can encourage the development of deeper roots. This helps the seedlings become more resilient and capable of withstanding drought conditions.
To ensure proper drainage, consider the type of container you’re using for seed starting. Whether you’re starting seeds in trays, egg cartons, or peat pellets, make sure the container has holes at the bottom to allow excess water to escape.
In conclusion, water plays a pivotal role in the successful starting of vegetable seeds. By understanding the proper watering techniques and the importance of good drainage, you can increase your chances of growing healthy and robust seedlings. For more tips on starting seeds, check our comprehensive guide on how to start seeds indoors.
Nurturing Seedlings
Once your seeds have germinated and developed into healthy seedlings, the next step in your seed-starting journey is nurturing these young plants until they’re ready to be transplanted into the garden.
Transplanting Seedlings
Transplanting is a crucial step in the seed-starting process. It allows your seedlings to establish and grow in their final growing location. Once the seedlings have developed a few true leaves, they’re ready to be transplanted into larger containers or directly into the garden.
Transplanting should be done when the soil is warm and there’s no longer a risk of frost. Avoid transplanting seedlings during hot, sunny days to prevent wilting and stress. Instead, choose a cloudy or cooler day for transplanting.
Before transplanting, it’s crucial to water your seedlings thoroughly. This ensures they’re well-hydrated and can withstand the stress of transplanting.
Hardening Off Process
Transplanting seedlings directly from a protected indoor environment to the outdoors can be a shock to their system. To help them adjust to outdoor conditions and reduce the risk of transplant shock, they need to go through a ‘hardening off’ process.
This involves gradually exposing your seedlings to outdoor conditions over a period of time (Fine Gardening).
Start by placing your seedlings outdoors for a few hours each day, gradually increasing the duration over a week or two. Monitor the seedlings closely during this process and protect them from extreme weather conditions, such as strong winds or heavy rain.
During the hardening off process, it’s advisable to gradually reduce the amount of water given to the seedlings. This encourages root growth and prevents overwatering.
Nurturing seedlings and preparing them for transplanting is an essential part of learning how to start vegetable seeds. With the right care and attention, your seedlings can grow into strong, healthy plants that produce a bountiful harvest. For more detailed information on starting seeds, check out our other articles on how to start seeds indoors and when to start seeds indoors.